Smiths Little torch
Set up and advice.
The Smiths Little Torch is probably the bestselling jewelers torch on the market. The solid aluminum body combined with copper nozzles and ruby set tips make this superb quality. The smooth precise valves give accurate control over flame size and temperature. USA quality and backed by a large established company, the Smiths Little Torch is a tool that you will use and enjoy for many years.
Note- in this document the term ‘Gas’ refers to compressed gas in cylinders, such as Oxygen and propane. It does not refer to gasoline (petrol) which is not used with any of these torches discussed.
The Smiths Little Torch is referred to as an Oxy – Fuel torch. So, it's important to understand what this means. For the fuel to burn, every torch needs Oxygen. In a basic torch, known as Gas & Air, the torch is simply connected directly to a fuel supply (gas cylinder). The Oxygen is supplied by the air in the atmosphere. So, the basic gas and air torches only require fuel. The small Chef’s crème brûlée torches and Sievert type torches are a gas and air.
However, when you want smaller flames, or hotter flames, the torch needs more Oxygen. The Smiths Little Torch utilizes very fine nozzles set with sapphires at the tips, which have been drilled with lasers. With such fine nozzles, the Smiths Little Torch requires pure Oxygen, at high pressure to burn the fuel at the maximum temperature. This type of torch is referred to as Oxy- fuel. The Smiths Little Torch is an Oxy-Fuel Torch, requiring both fuel (flammable gas), and Oxy (Oxygen) gas, and it is this combination which gives it it's great versatility. You may also see it referred to as an Oxy-Propane as Propane is the most popular fuel used with it.
The Smiths Little Torch Kit comes presented in a full color box. Inside you will find the torch, fully assembled with pre attached hoses and brass connectors. The torch also comes with a set of five nozzles.
Note- Smiths make the torches with several threads for use with UK, USA, and Australian gas cylinders. In either case brass adapters are readily available - just ask at Pepetools when ordering. Buy the fittings for the country the torch will be used in.

Connecting up
Your torch needs to be connected to fuel and Oxygen. To do this, you will need several things. For most users the chosen fuel will be Propane.
- Oxygen cylinder
- Oxygen regulator
- Oxygen Flashback arrestor
- Fuel gas cylinder
- Fuel gas regulator
- Fuel Gas Flashback arrestor
Remember also, a flint striker or electronic igniter to light the torch safely. See suggestions below.
Oxygen.
Oxygen is supplied as a compressed gas in steel cylinders. They range in size from small tanks the size of a soda bottle, right up to large industrial tanks as large as a man. The Smiths Little Torch is extremely economical to run, so the smallest tank available will usually be sufficient for most uses. Consider the space required at your bench and remember you will also need a fuel tank too. Even medium sized cylinders a couple of feet high can be very heavy and difficult to move around, another consideration for the home user or small business.

Fuel.
The Smiths Little Torch can use an assortment of fuel types. Small disposable cylinders of Mapp gas and Oxygen can be used, but these small disposable cylinders can be quite expensive. Smiths do sell a specific kit with adapters for these disposable “cans”. The adapters convert the cans to standard gas fitting for the torch. No other regulators or valves are necessary.


and the adapter.
Propane.
The best option for most users are regular Propane cylinders which are readily available. Combined with Oxygen, propane produces enough heat to melt and cast silver and gold.

Readily available and easy to transport and store.
Acetylene. For users of platinum, a little more heat is needed. Some prefer to use Acetylene gas which burns at a much higher temperature than propane. But this may be more difficult to source and more expensive. It is also important to note that acetylene is more volatile than other gasses. Some local authorities may require permits to use and store this gas. This may be especially important if you wish to have it in a home workshop. Check your local guidelines (speak to your local fire department for advice)

Acetylene cylinders in a range of sizes.
For most jewelers, small propane cylinders offer the best value and most economical option.
Where to buy gas.
Before you purchase an oxy fuel torch, ensure that you can buy gas cylinders and Oxygen cylinders from a local supplier. Search online for welding supplies, builders’ merchants, or gas suppliers. In some cases, you pay a monthly rental for the cylinder itself, and then pay for refills. When empty the cylinder is simply swapped for a full one. For heavy users this can be the cheapest option, but note this is an ongoing monthly cost to rent the cylinders. Other companies allow you to buy a cylinder outright and then pay for the refills. This can be a better option for the casual user or hobbyist, but may require more initial outlay. Does the company deliver? Or will you have to take the cylinder to the store for refills? - Check this out beforehand.
Top Tip
There is nothing more annoying than running out of gas half way through a job. So it's always a good idea to have a backup cylinder each of Oxygen and propane on hand, for a quick changeover when needed. For ease or storage and cost, perhaps just have a couple of the smallest cylinders as temporary backups.
Top Tip
Small propane cylinders are often readily available at gas stations (petrol stations), DIY stores, and Garden Centres. Propane is used for heaters, barbecues, caravans and camping, so it's usually easy to purchase. Oxygen however is only really used for welding, so you may need to find a local welding supply company to obtain Oxygen cylinders.
Regulators.
To accompany your gas cylinders, you will need regulators. These connect to the top of the cylinder and allow you to “regulate” the output pressure of the gas. Fine adjustments can be made by the valves on the torch itself. But you need to ensure that torch has sufficient pressure. Too much and the flame will simply blow out and be uncontrollable. Too low and the flame will be small and won’t give the heat you require.
The regular bent, straight or twin jet nozzles require from 2 PSI up to 8 PSI for both Oxygen and fuel. The optional MultiJet nozzle requires an output of 14 PSI for Oxygen and 10 PSI for propane. Ensure that your regulators can output within this range.
Note that some fixed propane regulators for barbecues etc are very low pressure and may not be suitable. You should opt for adjustable regulators ensuring that you match the regulator to the gas you are using, Oxygen, propane, or acetylene. Your local welding supplier should be able to supply you with suitable regulators along with your gas cylinders.

Gauges.
Regulators with gauges are ideal. A single gauge will tell you the output pressure allowing you to set it accurately. Regulators with two gauges will also show you the the input pressure. This is a great bonus as it will tell you when the tank is nearing empty (the input pressure will go down). Gauges usually come as part of the regulator. However, if you cannot find propane regulators with gauges, a simple bit of trial and error will allow you to set the pressure. With the torch fuel valve open, and the largest nozzle, you want to get the biggest flame you can - without the flame blowing itself out. This is the maximum the torch can handle. From here you can reduce the flame using the torch itself. Once set, you need never touch your regulators again, as the flame is controlled by the torch, regardless of which nozzle you use.
Flashback arrestors.
These are small brass tubes which attach to the Oxygen and fuel hoses. In the event of fire tracking down the hose the flashback arrestor cuts off the gas from that point onwards. Usually, they are fitted close to the torch, to protect the hoses. But in the case of the Smith Little Torch the hoses are pre attached, so the flashback arrestors will be attached between the regulators and the hose. As mentioned above, ensure that you get the correct fitting for your Smiths’ hose and your regulator. Your torch will work fine without them and is in no way going to burst into flames, but these inexpensive arrestors are a simple additional safety feature and well worth the small price. Once purchased they will last indefinitely, but if triggered (by a fire) they will need to be replaced.

Flashback arrestor (about 6" long). You will need two,
one for the propane (or other gas) and one for the Oxygen.
Ignition.
An important but overlooked safety aspect is how you light your torch. Many people use a cigarette lighter, but this should be avoided. Using a gas filled lighter to ignite your torch can be dangerous. If you think about it, you have a small container of pressurized butane gas (your cig lighter) in your bare hand and you are pointing a lit torch at it. There have been stories of lighters exploding and causing severe injury. Likewise, if you turn up the gas too high, or if you are using the larger nozzles. Once ignited the flame can be quite large and engulf the hand. Hence it is always recommended to use a correct lighter designed for torches. There are several available.
Flint striker.
This is simply a pair of spring metal tongs. At the end of one arm is a small metal cap with a file inside, the other arm has a flint in the end. When you squeeze the handle, the flint creates a spark. It is held a couple of inches away from the nozzle and simply squeezed. This has many safety advantages over a cig lighter, the flint striker is all metal and the long handle keeps you away for the flame. Also, the metal cup shields the flame from anything in front of it. These strikers can be purchased from any good jewelry tool supplier (or perhaps your gas supplier). Remember to buy a few spare flints with it.

Electronic igniter.
A more modern approach is the electronic igniter. Simply tap the torch nozzle to one of the metal contacts and a spark is created in the center, igniting the flame. The advantage with these is that they are totally hands free. Just be mindful where you place it on your bench and the potential direction of your flame when ignited. These are particularly useful if you flame blows out part way through a job, instantly reignite without having to put anything down. These are great for busy work, where the torch is on and off constantly.

Connecting up you torch

This is nothing to be intimidated by, connecting up your gas only takes a minute and is really simple.
Note: Gas connectors make an airtight seal with the brass fitting itself pressing against the inside of adjoining one. It is important to ensure that your fittings are inserted straight and parallel. Initially, just use your fingers to insert and screw them together. This will avoid any potential damage.
VERY IMPORTANT under no circumstances should you use oil, grease, silicone or any kind of tape, lubricant or sealant. The fittings should be clean and free from any debris- but that’s it. Just screw them together.
Attach regulators to the gas cylinders
Firstly, attach the regulators. These screw into the tops of the cylinders. One for gas and one for Oxygen respectively. Note that gas threads are often the opposite way round to Oxygen threads – this is a safety feature ensuring you can’t connect them to the wrong lines. So do check you are turning them the correct way, and ensure you have the regulators on the appropriate cylinder. Use your fingers to start, gently screwing them in.
Attach flashback arrestors.
Normally these would be attached close to the torch, but in the case of the Smiths Little Torch the hoses are pre attached. In this case you can connect the flashback arrestors to the regulators. Note you will have an Oxygen and a propane flashback and again they will both screw in opposite directions.
Attach hoses
Finally, connect the torch hoses to the flashback arrestors. Again, just finger tight at first, remembering they too turn in opposite directions. You can’t mix them around. Have a quick visual check that everything looks right, with no wonky misaligned fittings. If everything looks right, then tighten everything up with a spanner, adjustable spanner or plumber’s wrench. The fittings need to be snug and air tight, but don’t over do it. All the gas fittings are made of brass and the threads can easily become stripped, or the nuts rounded off, with excessive force or the use of an incorrect spanner.
Quick check.
Close the torch valves and turn down the regulators. Open the gas cylinder fully and listen for any hissing or leaks at the top of the cylinder. Next open the fuel regulator fully, and listen for a hissing sound along the fuel hose and at the torch. Open the fuel valve and gas should now be coming out of the torch. Close all valves, and then repeat with the Oxygen, opening the cylinder first, the regulator and then the torch, checking along for any leaks.
If you do suspect any leaks, check that the connectors are fully seated properly and tighten up with a spanner. If the fittings are screwed together correctly and straight, they should be airtight. Excessive force is not needed.
Whilst many people use soapy water with a drop of dish soap to check for gas leaks. This is frowned upon by professionals. As above, detergents and soaps should not be used on the brass fittings. It is highly recommended to purchase a can of gas detector spray. If you suspect a leak, spray the area with the detector spray and look for small bubbles where the leak is. Tighten the connection and re-spay to check again. No bubbles should be seen. When you're happy, wipe down all equipment with a soft dry cloth.

Aerosol can of Leak Detector Spray.
Setting the pressure.
Once connected, open the valves on the torch fully. Close the regulators, and then open the gas cylinders fully. Adjust the regulators until the gauges show the desired output pressures. Close the torch valves. You're now ready to go.
SUPER TOP TIP. In the instructions you will find a chart with the recommend pressures for each nozzle. But basically the pressure in PSI equates to the number of the nozzle. For a number 3 nozzle set the fuel and Oxygen regulators to 3 PSI, for a number 6 nozzle set them to 6 PSI and so on - simple !
The multi-jet casting nozzles require 10 PSI Fuel and 14 PSI Oxygen.
See separate information on the optional natural gas casting nozzle.
Basic Operation.
Fully open the valves on the Oxygen and gas cylinders (your regulators should be pre-set and never need adjusting).
Bleed the hoses.
The hoses may contain air, especially if they haven’t been used for a while. So, you need to flush the hoses to ensure they are filled with pure Oxygen and gas. This is referred to as bleeding. Open the gas valve on the torch (red) and allow the gas to escape for a few seconds (you should hear it hissing). With propane you will be able to smell when the gas is coming out. Close the gas valve and open the Oxygen (green) valve. You can’t smell the Oxygen but allow it to escape for a few seconds. Then close the Oxygen valve. If the torch is being used on and off all day, you would usually only need to bleed the hoses once at the start of the day.
Tip: If you are using a very small nozzle, this can take a while for the gas to appear. So, it may be better to remove the nozzle, bleed the hoses for a few seconds and then replace the nozzle.
Attaching nozzles.
The nozzles simply screw onto the end of the torch. Select your chosen nozzle (the number is stamped on the copper part) and screw onto the end of the torch, finger tight. Then you can rotate the nozzle to the desired direction (pointing away from the valves) and fully tighten. You can use a small spanner but don't over tighten. Finger tight is usually fine, the nozzle will not fall off or rotate.
Note the finest number 2 nozzle is only really recommended for acetylene or hydrogen. It is usually too fine to use with a Propane flame.

The chart above shows the relative flame sizes for the basic straight or curved nozzles.
Operation.
After bleeding the hoses, the normal procedure is to open the red torch gas valve, just ¼ turn or so and ignite the gas. This will give you a small yellow flickering flame, like a candle. Increase the gas for a larger flame and then slowly open the torch Oxygen valve (green). As you increase the Oxygen, the flame will turn blue. For soldering you want a slightly soft blue flame. A flickering yellow flame will not be hot enough or controllable (not enough Oxygen). Vice versa, too much Oxygen will create a very sharp looking hard pointed flame. Often you can hear this type of flame hissing. This is too aggressive for soldering, so reduce the Oxygen a little to soften the flame. For annealing, use a larger nozzle, more gas, and less Oxygen to produce a large bushy flame for gently warming the metal.
After use, turn off the torch valves. It may be a small point, but turn off the gas valve first, as this will extinguish the flame, then turn of the Oxygen. Turning off the Oxygen first will make the flame turn from blue pointed to a large flickering yellow. So, it’s safer to turn off the gas first.
At the end of the day.
Shut off the gas at the top of each cylinder. Open both the valves on the torch to release the pressure in the hoses (remember the gas coming out is still flammable). Leave open for a few seconds until they stop hissing. This simply reduces pressure in the system. Finally close both torch valves. You do not need to adjust the regulators, leave them set as they are.
Optional accessories.
Your Smiths Little Torch kit comes complete with various nozzles which will cover most jewelry tasks large or small. But Smiths also make additional nozzles for specific tasks. Double ended nozzles provide heat from two nozzles, heating both sides of your piece at the same time. A useful tool for those working with platinum who require that extra heat.

The Smiths Little Torch double head nozzle.
MUST HAVE – MultiJet casting nozzle.
Undoubtedly the best addition to the Smiths Little Torch is the MultiJet casting nozzle. Two are available, one for Propane and one for Acetylene. The nozzle produces a large wide flame at the end of an extra-long nozzle. With a soft bushy flame, this is ideal for annealing metal, such as bangles, bars, and coils of wire. With more Oxygen, the MultiJet nozzle can melt down several ounces of silver in a matter of minutes. Ideal for small castings, and recycling metal with a rolling mill. The extra length also keeps you and the torch away from the heat. So, don’t think the Smiths Little Torch is just for extra fine work. With the right nozzle it can melt almost anything.

The Smiths Little Torch multi-jet casting nozzle.
Note there are two versions, Propane and Acetylene.
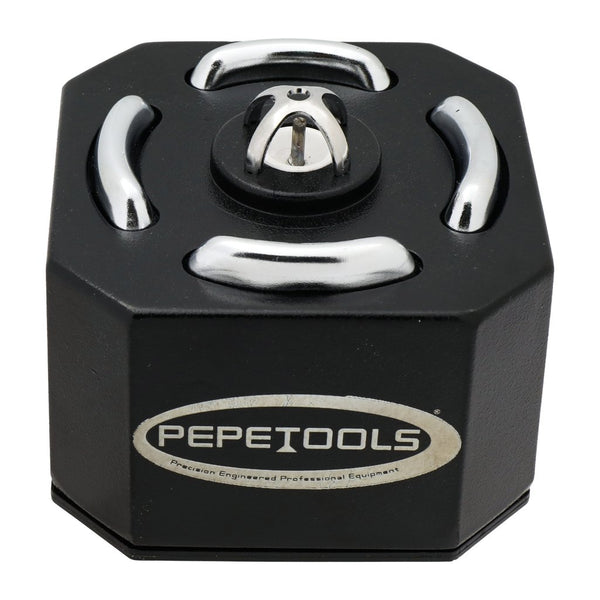
The magnetic Stand. Is also a useful addition allowing you to store the torch and nozzles on the bench. Note that the aluminum torch is not magnetic, and hence why a metal clip is placed around the torch which allows it to stick to the weighted magnetic base.
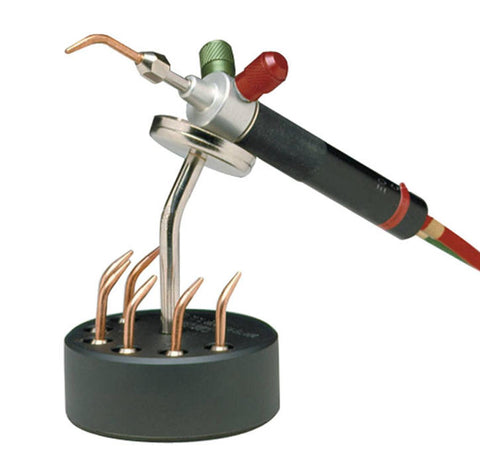
Smith Little Torch magnetic stand.
Once set up you will find that the Smiths Little Torch is a highly versatile tool, for soldering, annealing, melting and casting. With ultra-fine precision and control, it will quickly become an extension of your hands. Genuine USA quality - be aware there are many fakes and copies. Always buy from a reputable dealer.
by Dave Wilson
www.celticdreams.co.uk
© 2020 Pepetools.
www.pepetools.com